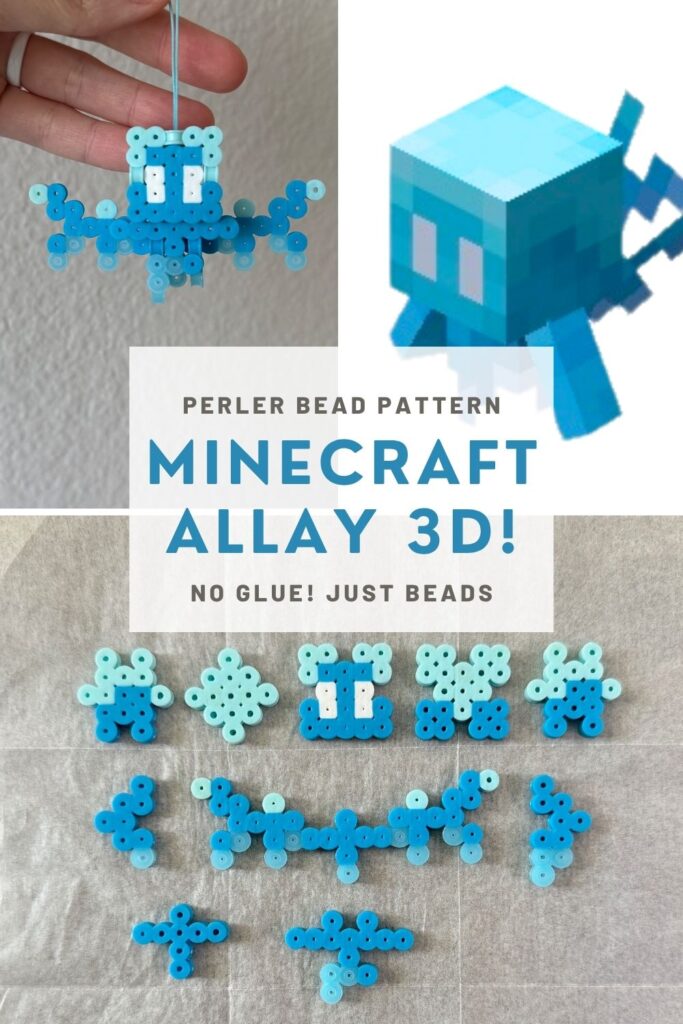
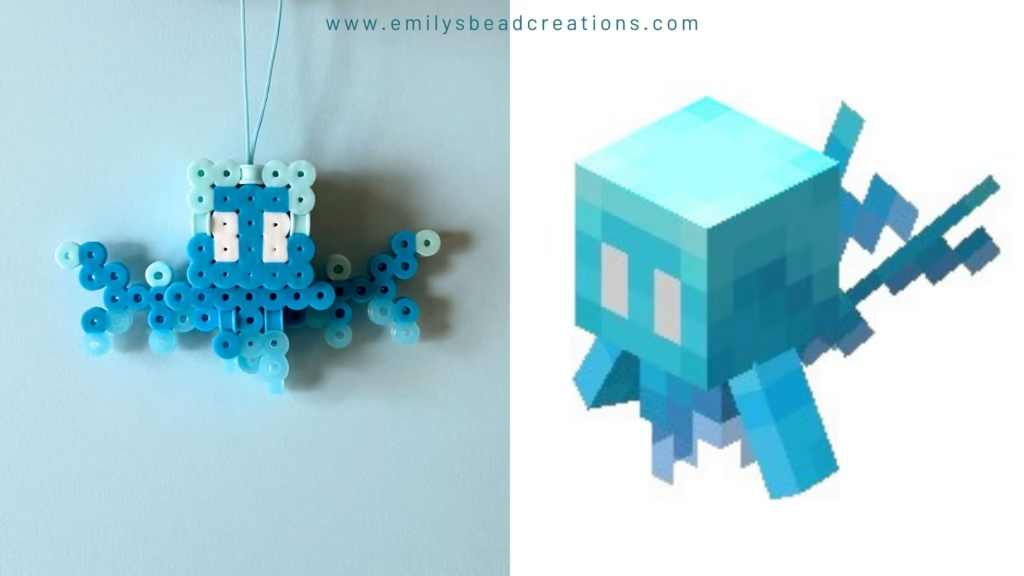
Do you love Minecraft allays? I do! 🩵 That’s why I designed a brand new 3D Minecraft Allay Perler bead pattern. The best part? It only takes about 20 minutes and 164 fuse beads to make! This is a super simple design with a very cute outcome. Want to make one with me? (Check out the video build!)
Materials List
For this build, you’ll need the following beads and equipment.
Beads:
- 52 light blue fuse beads (I used Perler Robin’s Egg)
- 92 darker blue fuse beads (I used Perler Turquoise)
- 4 white fuse beads (I used Perler White)
- 16 transparent blue fuse beads (I used Perler Clear Blue but a sparkly color would be nice, too!)
Equipment:
- Large pegboard (I used Perler Clear Pegboard)
- Iron (I’ve used this one for years)
- Parchment paper (the regular stuff works as well as the special Perler sheets!)
- (optional but recommended) Perler Bead Tweezers
- (optional) String to make your allay “fly” and a needle threader to pull it through a bead (I used these charm lanyard we already had, but string should work just fine!)
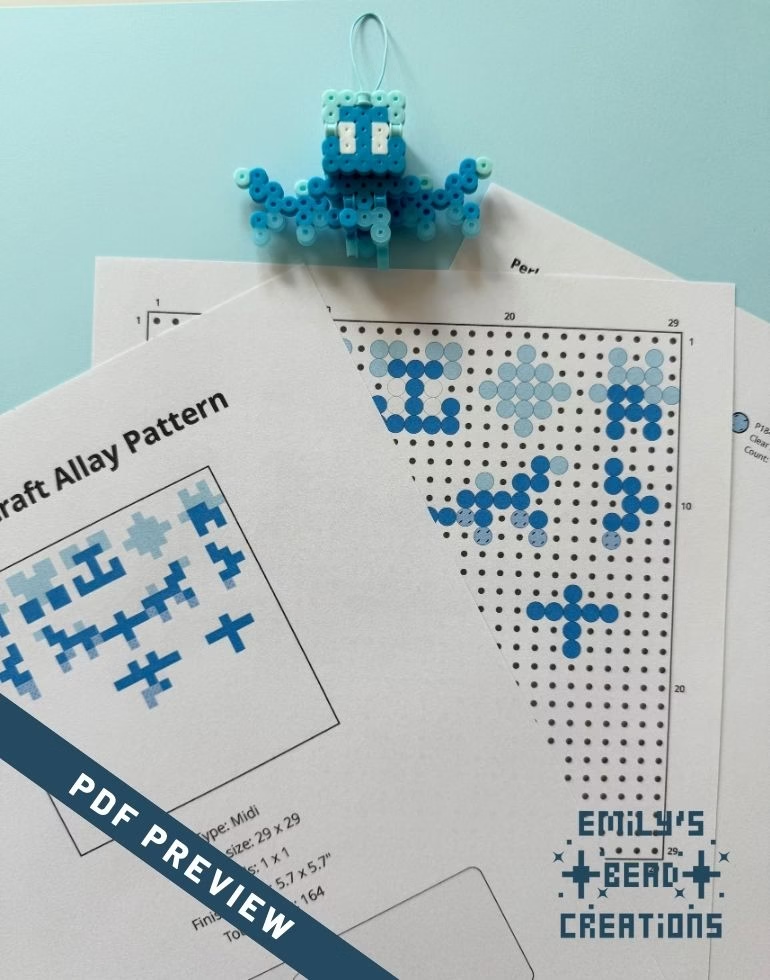
Optional: For just $1, print my 3D allay pattern to take this build offline! Includes colors, bead counts, and easy-to-follow pattern. Every pattern purchase helps me invent and share new projects like this one. 💖
Instructions: Build a 3D Minecraft Allay Step by Step
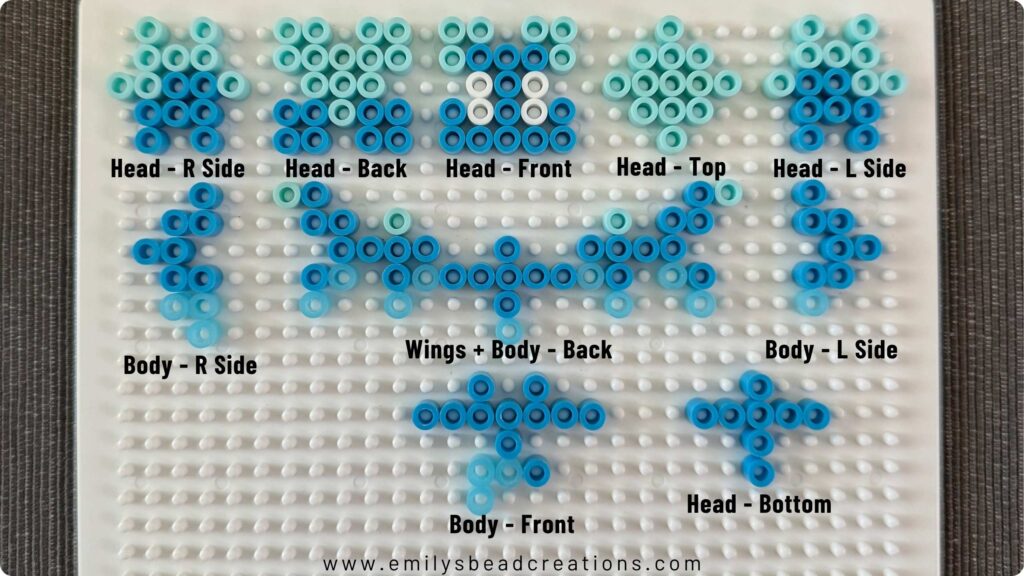
Step 1: Copy My Pattern
On a large pegboard, follow the pattern to create the puzzle pieces of your 3D Minecraft Allay. Make sure you copy the pattern exactly! Even one incorrect bead placement can prevent the pieces from fitting together into a 3D Allay. (No pressure. 😅)
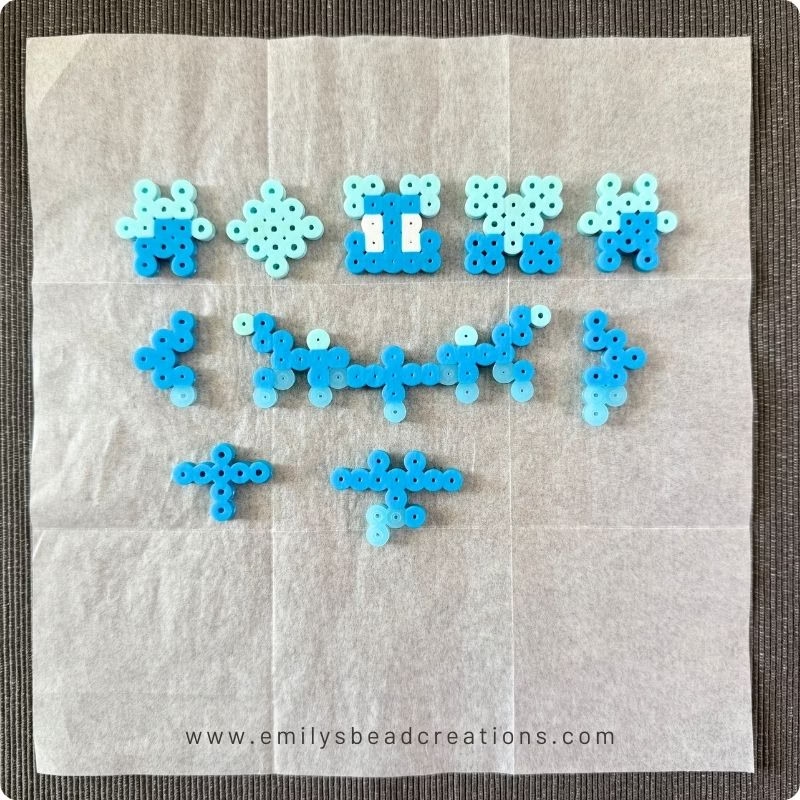
Step 2: Iron the Beads
After triple-checking that your beads are in the right place, you’re ready to iron them out. Always iron fuse beads on a firm, heat-proof surface using an iron on medium heat (NO steam!). Use slow circular motions and very little pressure to get a good even melt.
IMPORTANT! To make sure the pieces of your 3D creation fit snugly, melt the beads until they’re firmly fused but not so much that they’re getting flat. If the beads are completely melted, they won’t fit together properly. But if they’re not fused, the beads will unstick and your 3D creation will fall apart. It’s a delicate balance!
Let your beads cool down completely before moving on to the next step. To make sure they’re flat and straight, place something heavy like a textbook on top of the beads (still encased in parchment paper) while they cool.
Step 3: Assemble the Head of Your 3D Allay
Now that your beads have completely cooled, it’s time to put together your very own 3D Minecraft Allay! Using the guide above, (gently) attach the pieces of the allay’s head together. They should “snap” together with a little pressure.

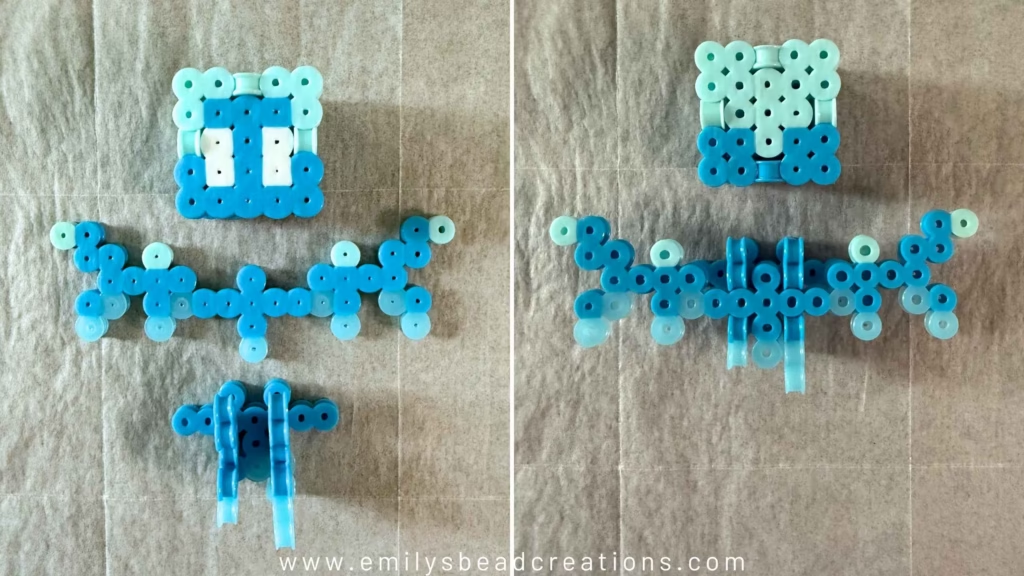
Step 4: Assemble the Body of Your 3D Minecraft Allay
Nearly there! Now, it’s time to build the body. First, attach the left and right sides to the front of the allay’s body. Then, turn the body “belly down” and snap the wings into place.
Step 5: Admire Your 3D Minecraft Allay!
Place the 4 pegs at the top of the body into the 4 spaces on the bottom of the allay’s head, then turn this little pal around and admire your new 3D allay! 🎉

Optional Step 6: Add a String to Make Your 3D Allay Fly
Since this 3D allay has an uneven base, it can’t quite stand on its own. But a standing allay would be silly, anyway! I helped mine fly by threading a charm lanyard through the top of her head, like this:

You can also use any string or yarn and tie a knot on the side that gets tucked into the allay’s head. A needle threader was super helpful for this step.
Tips for Making Your 3D Minecraft Allay
Tip #1: Careful Melting/Ironing
To make sure the pieces of your 3D creation fit snugly, melt the beads until they’re firmly fused but not so much that they’re getting flat. If the beads are completely melted, they won’t fit together because the gaps will be too thin. But if they’re not fused, the beads will unstick and your 3D creation will fall apart. It’s a delicate balance!
Tip #2: Have Fun with the Colors!
While allays in Minecraft are always bright blue, your little pal can be any color of the rainbow! I had a lot of fun experimenting with different color combinations. I call this one the Amethyst Allay:
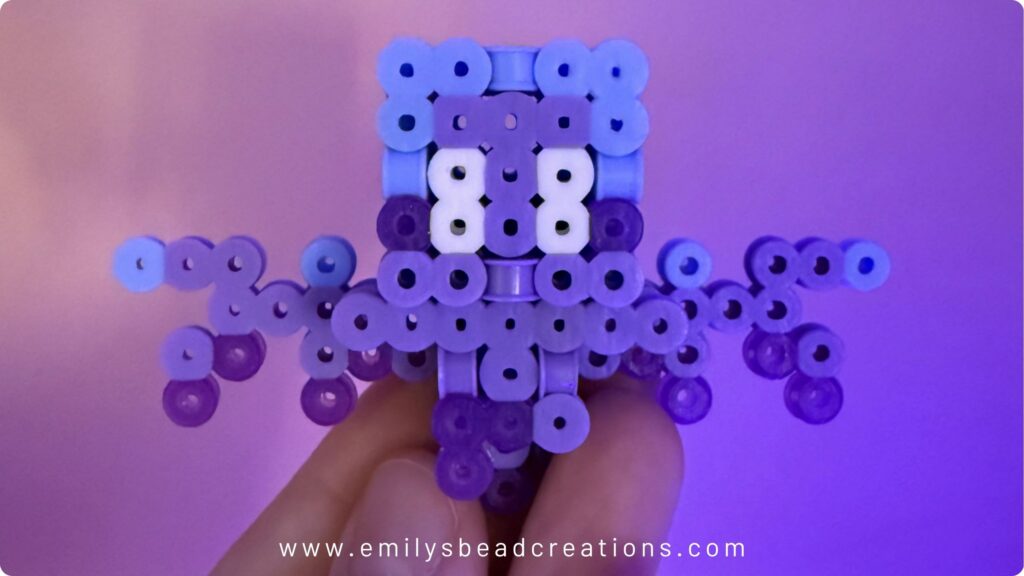
She’s also an earlier version of my design, so you might notice some differences in the wings and face.
I’m so obsessed with these cute little allays, tbh, and it’s going to be a challenge not to fill my house with them! Will you be making a 3D Minecraft Allay of your own? I’d love to see how yours turns out! You can share a picture of your 3D allay with me on Pinterest or in the comments below.
Until next time,
Emily 💖