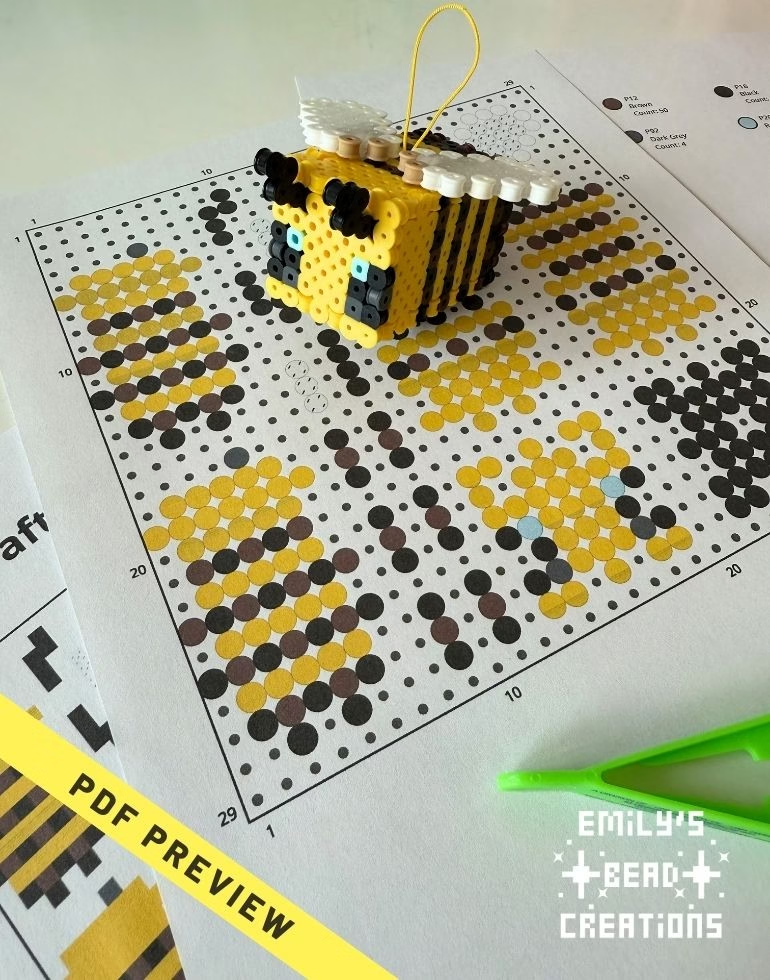
There are so many cute 3D Minecraft bee patterns for Perler beads out there, but most of them use super glue or hot glue to add the wings. I’m not a fan of glue, so here’s a design that’s totally glue-free. Every bit of this 3D bee snaps together beautifully. Can you bee-lieve it? 🐝

Materials List
For this build, you’ll need the following beads and equipment.
Beads:
- 2 light blue fuse beads (I used Perler Robin’s Egg)
- 32 clear fuse beads (I used Perler Clear)
- 24 white fuse beads (I used Perler White)
- 4 light brown fuse beads (I used Perler Fawn)
- 4 dark gray fuse beads (I used Perler Dark Gray)
- 74 dark brown fuse beads (I used Perler Brown)
- 99 black fuse beads (I used Perler Black)
Equipment:
- Large pegboard (I used Perler Clear Pegboard)
- Iron (I’ve used this one for years)
- Parchment paper (the regular stuff works as well as the special Perler sheets!)
- (optional but recommended) Perler Bead Tweezers
- (optional) String to make your bee “fly” and a needle threader to pull it through a bead (I used these charm lanyard we already had, but string should work just fine!)
Optional: For just $1, print my 3D Minecraft Bee pattern to take this build offline! Includes colors, bead counts, and easy-to-follow pattern. Every pattern purchase helps me invent and share new projects like this one. 💖

Instructions: Build a 3D Minecraft Bee Step by Step
Step 1: Copy My Pattern
On a large pegboard, follow the pattern on the PDF (or picture shown below) to create the pieces of your 3D Minecraft Bee. Make sure you copy the pattern exactly! Even one incorrect bead placement can prevent the pieces from fitting together.

Step 2: Iron the Beads
After triple-checking that your beads are in the right place, iron them out. Always melt fuse beads on a firm, heat-proof surface using an iron on medium heat (NO steam). Use slow circular motions and very little pressure to get a good, even melt.
IMPORTANT! To make sure the pieces of your 3D creation fit snugly, melt the beads until they’re firmly fused but not so much that they’re getting flat. If the beads are completely melted, they won’t fit together properly. But if they’re not fused, the beads will unstick and your 3D creation will fall apart. It’s a delicate balance! The wings in particular need to be properly melted or they won’t clip on (see step 4).
Let your beads cool down completely before moving on to the next step. Place something heavy like a textbook on top of the beads (still encased in parchment paper) while they cool so they stay flat.
Step 3: Assemble Your 3D Bee’s Body
Now that your beads have completely cooled, it’s time to put together your very own 3D Minecraft Bee! Follow the pattern’s labels to (gently) attach the pieces of the bee’s body together. They should “snap” together with a little pressure.
If you want to make your bee “fly,” I recommend you add the string before fully assembling the bee, as it can be hard to pull apart after assembly. Simply thread the string through the bead shown in the image and make a knot, or use a charm lanyard like I did. (A needle threader was super helpful for this step.)

Step 4: Add the Wings
Now that your 3D bee has a sturdy body, let’s give it wings! These wings are super nifty because they attach by poking the 3-bead clear stick through the top until only 1 bead sticks out, then clipping on the wing using the empty spot by the brown beads. No glue!

You can attach the wings so they appear longer (see the photo below with “wing long” showing the 3-bead edge) or wider/more spread out (see “wing short”). Either way is fine! I personally preferred the “wing short” style.

Step 5: Add Legs, Antennae, and Stinger
We’re nearly done with this Perler bead masterpiece. It’s time to attach all the little details: the legs, antennae, and stinger. Simply push them through the appropriate gaps left in the design. Be gentle — single-bead sticks tend to be easy to break with too much pressure.
Here’s the bottom of the 3D bee for reference:

The stinger can be 3 or 2 beads long; it’s up to you.

Your 3D Minecraft Bee Is Complete!
That’s it! Your adorable bee is ready to buzz off to a new adventure. Maybe it’s time to make honey? I made some cute flowers for my bee to enjoy. 🐝 🌼

What do you think — will you be making a 3D Minecraft Bee of your own? I’d love to see how it turns out! Share a picture of your bee with me on Pinterest or in the comments below.
Until next time,
Emily 💖
PS: Have you seen my pattern for a 3D Minecraft Allay? It’s TOO cute! 🥰 Plus, it only takes about 20 minutes and ~170 beads to make this little blue allay companion.


