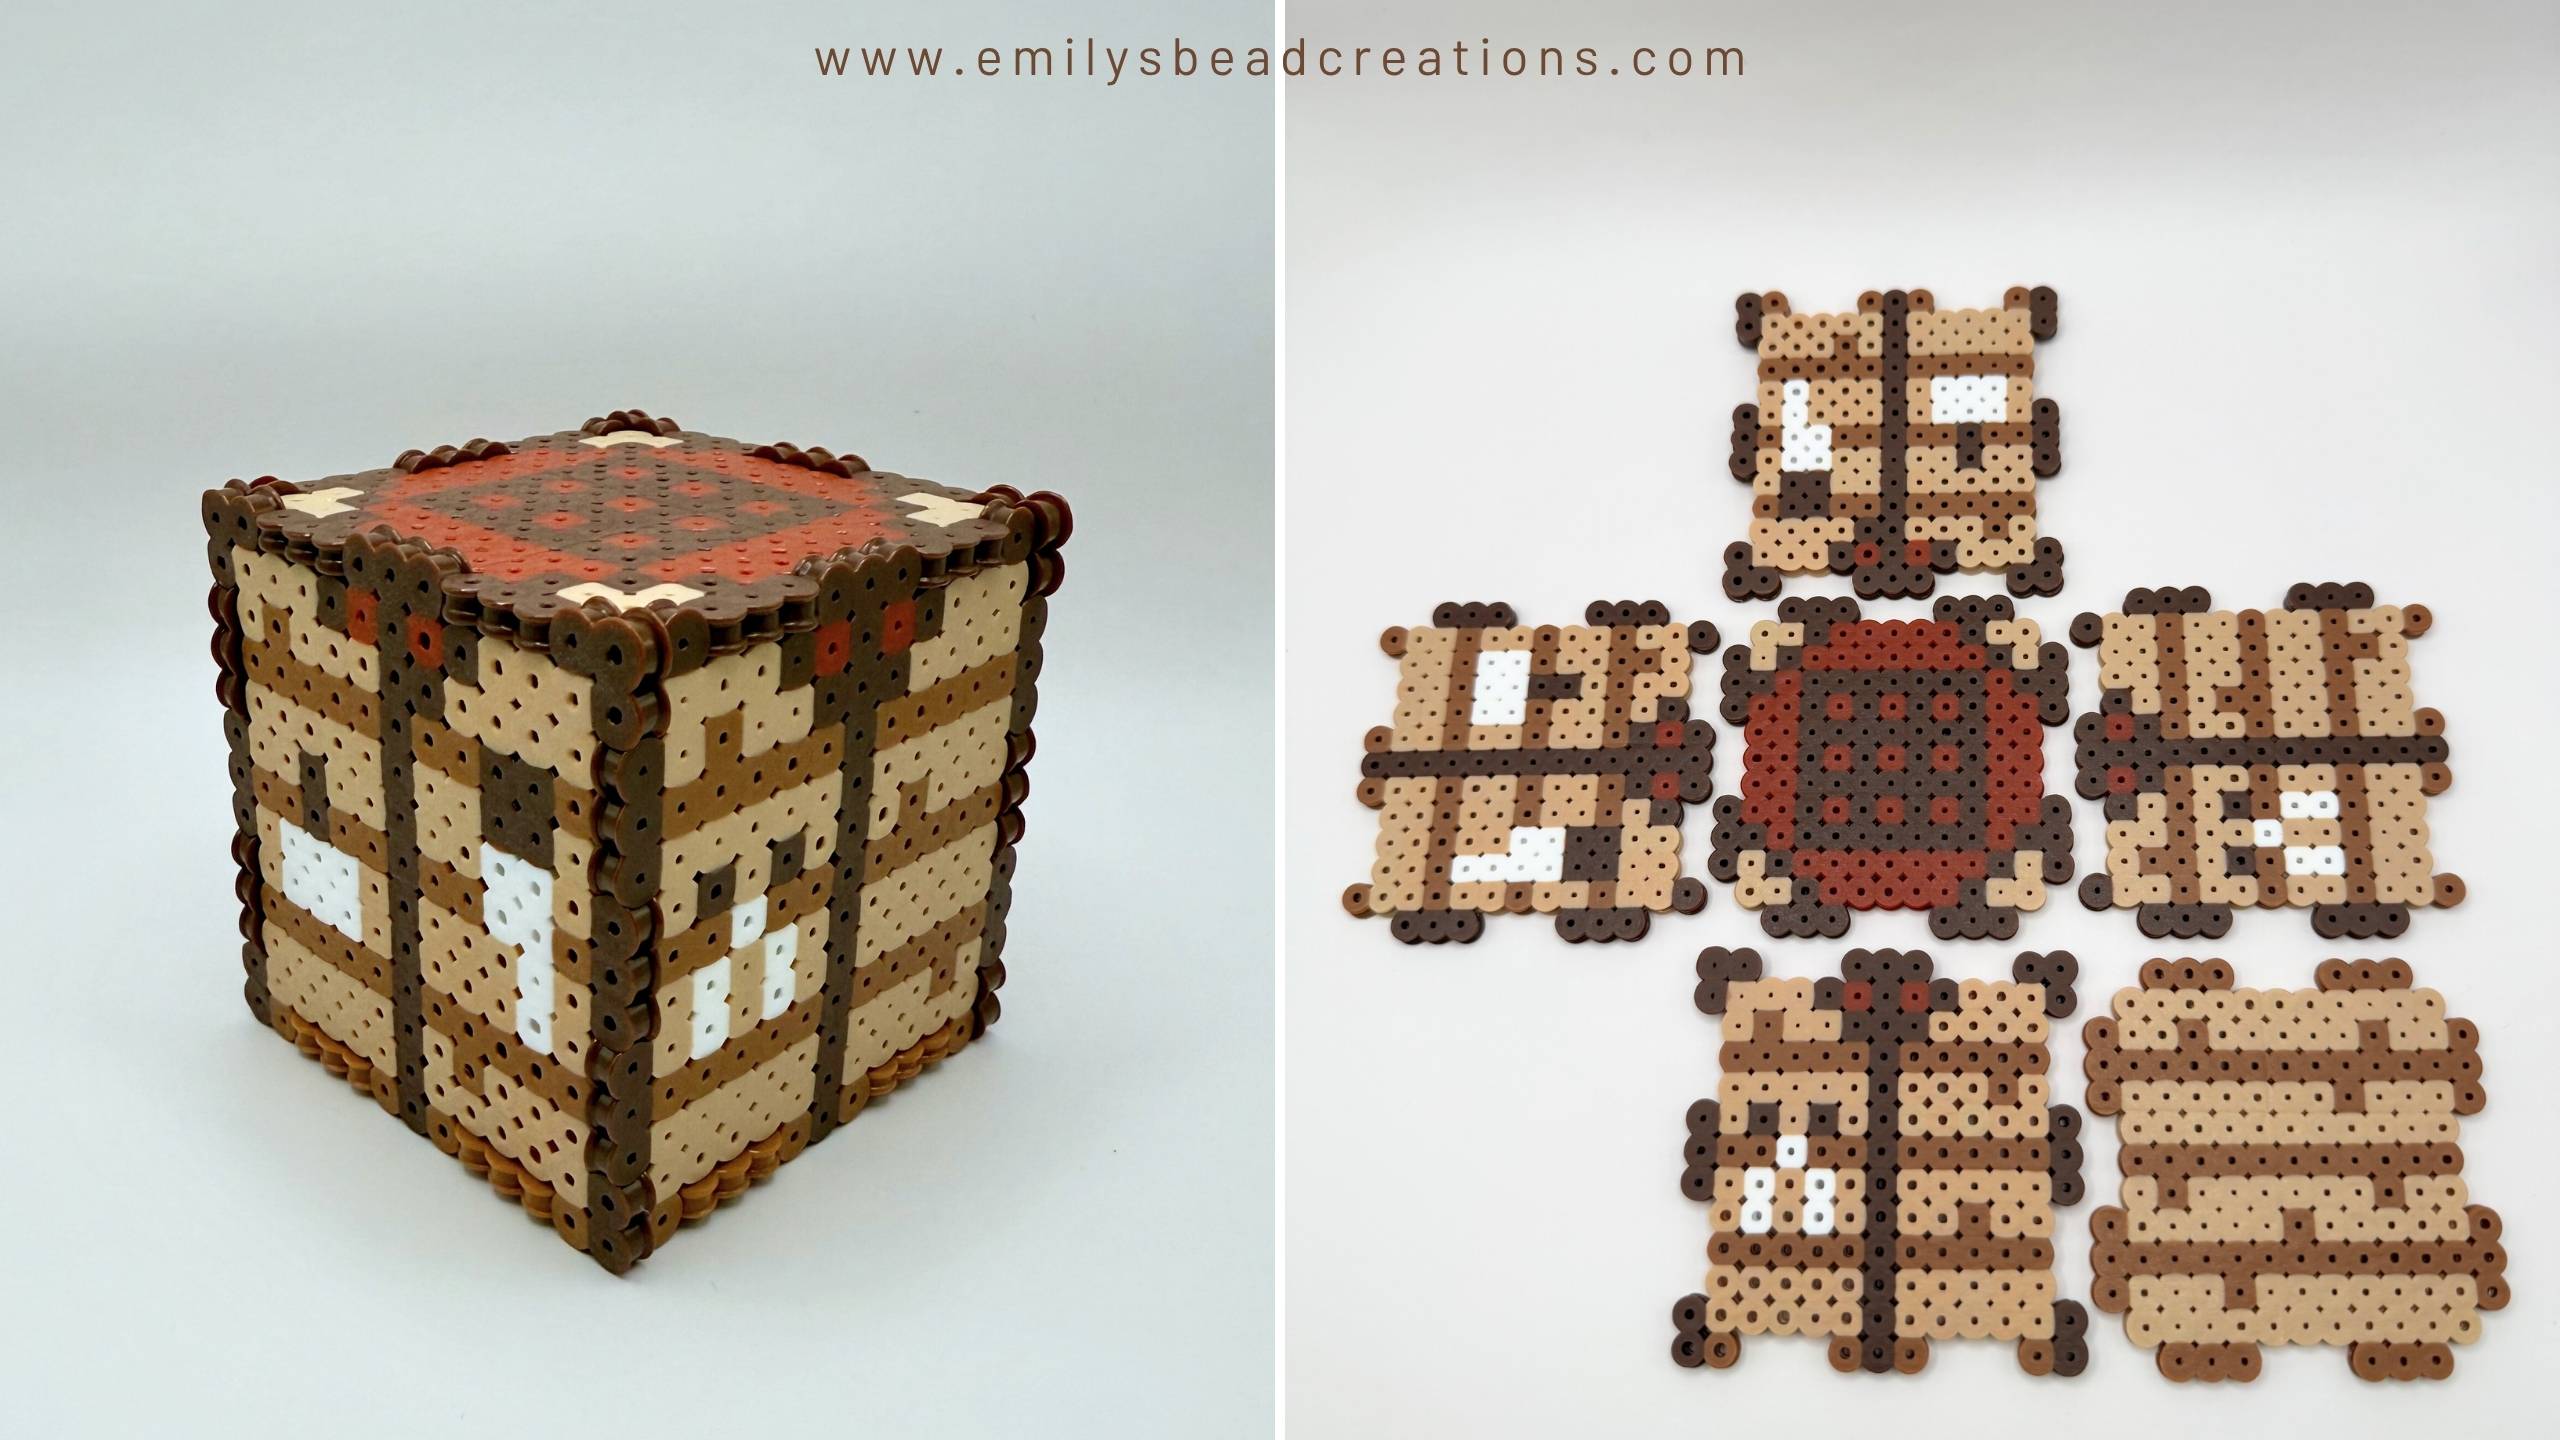
Today, I wanted to pay homage to the most basic of Minecraft survival tools: the crafting table. This is the first item I build in any world, so I figured I should build one in this world to join all my other Minecraft creations. Let me show you how to make a 3D Minecraft Crafting Table with this Perler bead pattern!

Satisfyingly cubed, right? Here’s what you’ll need:
Materials List
This is a cube with 6 13×13 sides, so it will take quite a few beads! (Nearly 1,000 😮.) These are my recommended colors:
Beads:
- 331 light brown beads (I used Perler tan)
- 195 medium brown beads (I used Perler light brown)
- 241 dark brown beads (I used Perler brown)
- 65 reddish-brown beads (I used Perler rust)
- 34 white beads (I used Perler white)
All these colors come in the Perler 22,000-bead mega-bucket, which I personally think has the best “bang for your buck” when it comes to fuse beads. But if you don’t have patience for seeking and sorting colors, this set of 3 shades of brown bead bags will get you most of the way there.
Equipment:
- Large pegboard (I used a large Perler Pegboard) — you’ll need at least 1, but having 2 is faster!
- Iron (I’ve used this one for years)
- Parchment paper (the regular stuff works as well as the special Perler sheets!)
- (optional but recommended) Perler Bead Tweezers
Optional: For just $1, print my 3D Minecraft Crafting Table pattern to take this build offline! Includes colors, bead counts, and easy-to-follow pattern. Every pattern purchase helps me invent and share new projects like this one. 💖

How to Make a 3D Minecraft Crafting Table
If you only have 1 large pegboard, you’ll need to break up this project into 2 rounds because only 4 sides of this cube fit on one large pegboard. If you have 2, you can do it all at once. If you’re not printing the pattern, you can follow the photo here:

Pay close attention to the placement of the edge beads, and make sure you leave at least 1 space between each segment of the crafting table. If there’s even one out of place, your bead creation will not snap together. It’s worth double-checking before ironing. I’ve caught more than a few accidents that way. 😅
Top Tip: For any 3D fuse bead creation, melt the beads a little more than you usually would for a flat design. This makes the beads wider, allowing them to connect better and more securely. As always, make sure you leave enough space between the pieces so they don’t stick together during ironing.
Once the beads are completely cooled, it’s time to assemble your 3D Minecraft Crafting Table. Simply snap the pieces together!
This is a fun build, but it pretty much exhausted my stock of brown beads. I think it’s time to work on a smaller version of this cube. Maybe 6x6x6? Make sure you subscribe for updates or follow me on Instagram or Pinterest to get my latest patterns in your inbox!
Until next time,
Emily 💖
PS: If you love Minecraft, you might also be interested in checking out some of my other Minecraft creations, like a 3D allay or bee!


